Testing Snowmobile Oil

Even though the snow has melted and the sun is starting to peek through the clouds, it is worth re-visiting the proper way to test snowmobile oil. Just as you would with car motor oil, open up the new quart of snowmobile oil and place the dipstick into the container. Remove the dipstick and let small drops of oil fall on a white sheet of paper or a paper towel.

Wipe the dipstick off and dip the stick into the oil tank. Pull out the dipstick and let a few drops of the old oil fall on the paper next to the new oil. Look for discoloration in the old engine oil. If the old oil looks significantly dirty, then you know that it is time for a change.

Did you like this? Share it:

Digital vs. Mechanical Controls

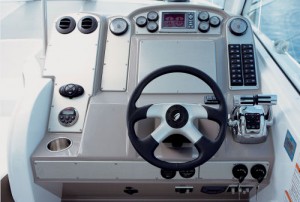
When selecting controls for a boat it is important to decide whether you want to go for mechanical and digital. If you’re unfamiliar with the differences, then allow me to explain. Mechanical controls connect to the engine via cables, one cable per engine.

Digital controls, on the other hand, make use of sensors and wires. This system transmits a signal from the controls to the engine’s computer. Mercury Marine models that utilize digital controls include the Verado and OptiMax. For additional information, talk to your mechanic next time you’re picking up snowmobile oil or spare parts.

Did you like this? Share it:

Whacky Weather Brings Early Winter Fun

As you may have heard, right around Halloween the northeastern United States got smacked with several feet of snow. My cousins live up north and they were out of power for more than a week. Schools were closed, public transportation shut-down – things were simply at a stand still.

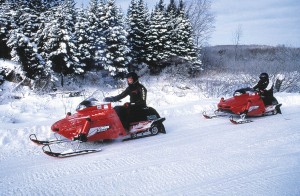
Lucky for my cousins, they had already started getting their snowmobiles ready for the winter season. When the snow stopped falling, they checked the snowmobile oil levels, revved up their engines, and went out for several days of fun. They weren’t alone either; a bunch of other young people had the same idea, too!

Did you like this? Share it:

Testing Snowmobile Oil

Now that the summer season is over and I’ve made plans to winterize my boat, I’m turning my attention to winter. While the area that I live in has fantastic summers, we also get quite a bit of snow. Like most people in my neighborhood, I own a snowmobile for winter recreation.

If you’ve been reading this blog for any amount of time, you know that I’m pretty particular about the oil I use. I always conduct a paper test on snowmobile oil. I simply place a drop of the oil from the engine on a sheet of paper and then put a drop of oil from a new bottle next to it. I compare the two dots and look for black coloration in the oil engine oil. If the old oil has too much grit and color in it, then I know it’s time to change the oil.

Did you like this? Share it:

Testing a Snowmobile Oil Pump

When it’s cold I can’t wait for warm weather, and when it’s boiling hot, as it is today, I can’t wait for the return of cool weather. I’ve been daydreaming about the snowmobile that is currently summering in my shed, and thought I’d use today’s post to explain how to test a snowmobile oil pump. An oil pump, for those unfamiliar with the mechanism, keeps the engine properly lubricated.

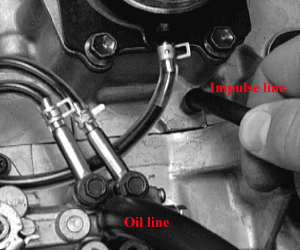
To test a snowmobile oil pump, start by disconnecting the threaded fitting on the oil pressure sending unit tube. You’ll want to use a wrench. Take your oil pressure test gauge and attach it to the port on the engine block. Start the engine and take a read out of the test gauge. A normal reading means you’re good to go whereas a low reading may indicate that the pump needs to be replaced.

Did you like this? Share it:

Offseason Snowmobile Care: Part Five

In the final installment of our series on storing your sled, we’ll look at some final measures to take before relegating your vehicle to a safe corner for its summer hibernation. Some models will have a secondary clutch, and if this is the case, you will need to disassemble it and apply grease to the sheave bushing. Lastly, every metal surface, nut and bolt should be coated with a preserving oil to prevent rusting be sure to keep the oil away from plastic and rubber components.

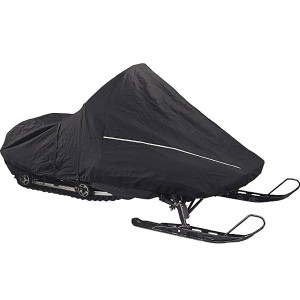
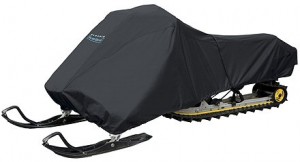
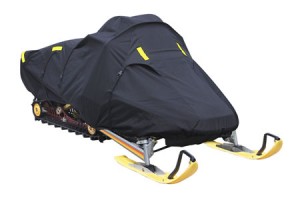
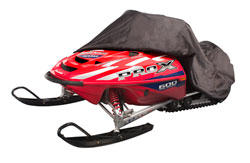
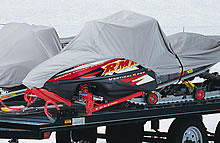
When determining a location to store the snowmobile, look for a dry place that is free of moisture. Place a cover over the body of the sled and put blocks underneath the front bumper and the rear frame, which will keep the track and skis off the floor. Refrain from starting the engine until the next season, as this will extricate the oil from the system. Before you startup you snowmobile next season, be sure that you double-check your Evinrude XD 100 and other essential fluid levels.

Did you like this? Share it:

Offseason Snowmobile Care: Part Four

When your sled is left idle for a prolonged period of time, the fluid levels and charge in the battery to diminish. Before storing your sled for the spring and summer, remove the battery and put it in a safe, dark area悠 recommend putting it where you keep your outboard motor oil and other supplies. Throughout the offseason, charge the battery periodically and fill it with distilled water if the fluid level drops below the fill line.

Fill the carb intake, muffler, and cooling system openings to prevent small animals from crawling into and nesting in your sled. It is also important to loosen the track tension bolts as far as they will go. If the track is kept taut during the offseason stretching and cracking may occur. Tomorrow we will go over the last preparations and finish our series on snowmobile storage.

Did you like this? Share it:

Offseason Snowmobile Care: Part Three

Yesterday we lubricated the entire system with Evinrude oil and prepared the fuel tank so that it won’t rust during the offseason; now its time progress to the carburetor and the drive belt. Begin by removing the float bowl drains from the carburetor, which will allow the fuel to escape. If fuel is left in the carburetor during the offseason, it will evaporate and leave a residue, which has the potential to clog passageways in your system.

Once the fuel is drained from the carburetor, remove the drive belt and store it unrolled in a safe location. Leaving the belt on during the offseason can cause it to warp to the shape of your sled. There is also the possibility of condensation collecting in-between the clutch sheaves and the belt, which will be detrimental to the smoothness of your ride. Tomorrow we will discuss proper storage of the battery and go over a few minor adjustments to ensure the integrity of your snowmobile isn’t jeopardized.

Did you like this? Share it:

Offseason Snowmobile Care: Part Two

Once the outside of the sled has been taken care of, it’s time to move to the more pressing concern: the engine. Begin by firing up your snowmobile and pulling the oil pump cable; doing this will enable a rich mixture of Evinrude XD100 oil to flow throughout the engine. The piston pin, bearings and some other engine components typically see little oil, and opening the oil pump ensures that they are properly lubricated before storage.

After you have ran the engine for 10 to 15 minutes, top off your fuel and add a fuel conditioner according to the specifications. It is important to top off fuel during the offseason to ensure there is no air in the tank. When the tank has air in it, condensation can form, which can wreak havoc on your machine. Now that we have dealt with the fuel and oil, tomorrow we will progress to the carburetor and drive belt.

Did you like this? Share it:

Offseason Snowmobile Care: Part One

Now that spring is in full swing, most of us won’t be going anywhere near our snowmobiles for a couple of months. But just because you won’t be on the back of the machine doesn’t mean that your snowmobile is out of harm’s way. A litany of things can go wrong with your vehicle while it’s in storage—from cracked parts and scratched paint to stale gasoline and outboard motor oil. To that end, it is imperative to take the proper precautions when storing your vehicle.

The first thing to do before putting your snowmobile in storage is to clean and polish it thoroughly. If using a pressure washer, use caution around bearing seals, as water can leak in and cause components to rust. Once the machine is dry, look for cracks and other signs of wear or damage. Now that the sled is clean and the body inspected, tomorrow we will start dealing with the various parts under the hood.

Did you like this? Share it:

Snowmobile Storage: Part Three

After you have allowed the Evinrude XD 100 to flow through the system and topped off your fuel, it’s time to drain the carburetor. Doing this prevents the buildup of residue that could potentially cause blockage next season. After this is done, you’re going to want to remove the drive belt and stow it by itself; this keeps it from forming to the shape of the sled.

Remove the battery and store it in a dark area, charging periodically throughout the offseason. Loosening the track tension will prevent it from stretching or cracking will in storage. Finally, you are going to want to apply oil to all of the metal surfaces to inhibit rusting. Once all of these steps are complete, put the sled in a safe, dry place and brace yourself for a long offseason.

Did you like this? Share it:

Snowmobile Storage: Part Two

The first thing to do when storing your sled is to wash and wax every inch. While this may seem like an unnecessary and purely aesthetic routine, this will help protect the paint job and the body of the vehicle. Once this is done, give the sled a quick onceover to find any chips or cracks, and it is advisable to paint the ski bottoms as well.

Now that the body is done, it is time to move on to the engine. Start up your snowmobile and pull on the oil pump cable to allow your 2 cycle oil to circulate through the entire system. Next, you want to fill the fuel tank completely, which will eliminate air space in the tank and ensure that condensation can’t form.

Did you like this? Share it: