Tune-Up V: Now Have Some Fun
outboard-motor

This past week, we’ve looked at virtually every facet of an annual outboard tune-up, from inspecting the propeller blades to scanning for oil leaks and replacing the fuel filter. In today’s final installment of our five-part series, we’ll finally get to enjoy the fruits of all that labor. In other words, it’s time to hit the water. After adding wax to the cowling in order to protect from corrosion, you’re all set to mount the outboard and take it to a lake or river.

Once the motor has been mounted, it’s time to start the engine. Unfortunately, there are a few more checks to be performed before we can use the boat for recreational endeavors with any confidence. We’ve already replenished the motor with fresh outboard oil, but we have not yet checked the water pump. The flow of water near the rear of the engine should give us a good idea that the pump is functioning properly.

Allow the engine to idle for a few minutes while it warms up. Adjust the carburetor jet and twiddle the fuel-mix knob at the front of the motor. It should begin to idle smoothly. Then put it into gear and take a quick spin. This maintenance procedure should keep your outboard motor running smoothly and trouble-free for the remainder of the season.

Did you like this? Share it:

Tune-Up IV: Find and Replace the Fuel Filter

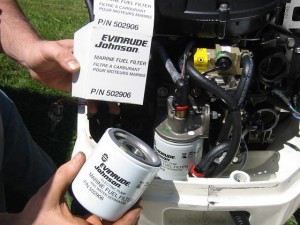
boat-motor-oilToday we present the fourth in our five-part series on annual outboard motor tune-ups. With any luck, this will have given you a better idea of how to go about conducting this yearly routine. As always, it’s critical to follow the maintenance guidelines provided by the outboard manufacturer above all else. Now, let’s move on to the fuel filter. This unit separates fuel from water, in effect allowing the motor to run smoothly and efficiently.
It only stands to reason that before you can replace the filter, you must find it. Not all outboard motors are alike, but generally speaking you’ll find the fuel filter inside the cover at the engine end of the fuel pump. Any water or sediment you find built up within should be removed, then replace the filter with a new one. Next it’s time to turn our attention to the cowling on the engine.

Believe it or not, a thin coat of car wax on the cowling can help keep rust at bay and restore luster. Begin mixing fuel for your 2-stroke outboard according to the proportions recommended in your outboard manual. After combining fresh boat motor oil with fuel, you’re at last ready to drop that engine in the water. Mount it and set it up on the transom without much trimming.

Did you like this? Share it:

Tune-Up III: Replacing the Spark Plugs

marine-engine-oil1Before picking up where we left off yesterday – greasing a few of the moving parts of the throttle – let’s quickly review what’s been done so far. We began the annual full-scale outboard tune-up by looking closely at the propeller for serious signs of wear and tear. Next, we looked for visible leaks around the propeller’s base. We added new marine engine oil to the outboard and replaced old lubricant in the motor’s lower unit with new.
Now it’s on to the throttle control – a crucial part of the boat that is used to determine fuel flow and, in effect, the speed of the craft. Start twisting the hand throttle around, watching the motor all the while and making mental notes of the moving parts. These should then be lubricated with standard marine grease. As always, the motor manufacturer may have a special suggestion as to which brand to use.

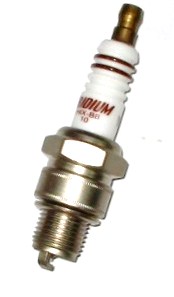
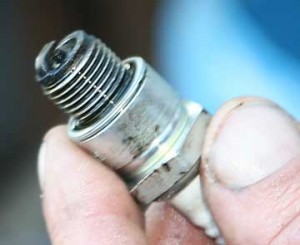
You’re now ready to disengage the sparkplug wires. Take special care to memorize where they are located and how they are positioned – that way you’ll be able to replace them just as they were. Take an adjustable wrench to each sparkplug and substitute it out for a new one. Tighten the new plug with your hand, then secure it fully with the wrench. Be forewarned that if you should overtighten the plugs, damage to your cylinder head could result.

Did you like this? Share it:

It’s Outboard Motor Tune-up Time, Part II

ob_maint_1_-038

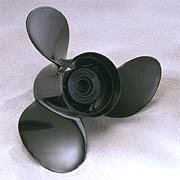
When we left off yesterday, we were right in the middle of a visual inspection of the outboard motor – the sort of examination that should be performed every time you undertake the annual tune-up process. Now that we’ve established that no fluids have obviously leaked from the motor to the ground, it’s time to take a close look at the propeller. Small cracks or nicks in the tip of the blades can decrease efficiency, as can misaligned or bent blades.

Again, I’d ask you to defer to your owner’s manual at this point. Seek out the seasonal tune-up recommendations and find out whether or not you should be changing lubricant in the motor’s lower unit. If recommended, remove the top and bottom fill plugs and watch carefully as the lubricant drains into a spare waste container. Just as you replaced your old motor oil with bulk oil, substitute in new lubricant.

The lubricant applicator’s nozzle should fit nicely in the bottom fill hole; squirt it into the gear case. Then, just as it starts to overflow and ooze out of the top fill hole, return the top plug to its accustomed place. Do the same with the bottom plug and wipe away any extraneous lubricant with a cloth. We’ll continue with necessary lubrication in tomorrow’s edition.

Did you like this? Share it:

It’s Outboard Motor Tune-up Time, Part I

evinrude-oil1In order to keep your marine motor running smoothly and efficiently, it’s essential to perform a full-scale tune up at least once a year. This guide to annual tune ups is not intended to be an absolute authority on how to do your maintenance work but rather as a series of suggestions. As previously discussed, each individual outboard comes with a specialized maintenance schedule courtesy of the manufacturer. Adhere to that schedule first and foremost.
Just as you would with your daily or weekly maintenance routine, begin this one with a visual inspection – and not just a simple once-over, either. By scoping out potential motor issues and stumbling blocks ahead of time, you ensure that repairs can be made in a timely manner. Turn the motor off before commencing the inspection. Then remove the cowling so that the power head is visible.

Scanning from the propeller upward, check the motor’s vicinity for signs of leakage. If your boat has been in storage for any significant period of time, it’s possible that a leak exists without any visual clues; for example, the leaking fluids may have drained out of the motor and evaporated over that extended time. Remember that a bit of oil around the propeller and on the side of the gear housing is normal. Anything more than that – e.g. a large, dark slick of Evinrude oil running down the propeller, it could be time to consult a professional mechanic.

We’ll continue our visual inspection and begin to get our hands dirty in the next installment.

Did you like this? Share it:

The Trouble with Fuel Additives

bulk-outboard-motor-oilSeveral decades ago, when Congress granted the Environmental Protection Agency increased powers to regulate America’s air and water pollution, outboard motor manufacturers were forced to take notice. Inefficient 2-stroke engines had been the norm up to that point, and it was agreed that the outboard companies would either have to drop 2-strokes from their product lines entirely or find a way to make them more eco-friendly.
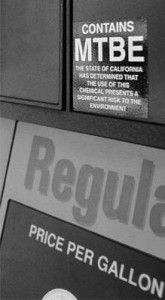
As evidenced by the newer offerings from Mercury, Evinrude and Yamaha, motor companies found innovative ways to boost efficiency. While most of these attempts were successful, others were ill-advised. This was especially true of the additives that were suddenly being used to supplement marine and auto fuels. An additive called MTBE was thought to bolster octane rating and to burn more of the hydrocarbons and carbon monoxide in the exhaust.

Unfortunately, MTBE also turned out to be a serious contaminant that mixes easily with water and seeps into groundwater leaving pollution in its wake. The latest replacement additive for MTBE, ethanol, isn’t much better when considered in high concentrations. Its environmental impact is beneficial, but the substance mixes with water to create a sludge that can crack and clog outboard fuel systems. It just goes to show that motor companies and researchers have yet to find the perfect fuel additive blend. For now it’s best to stick with low-ethanol fuel and bulk outboard motor oil.

Did you like this? Share it:

Performing Pre-operational Checks

evinrude-oilIf you’re anything like me, your outboard-powered boat is your true pride and joy; it’s your portal to a quiet, early morning fishing session or to an adventure in uncharted waters. Since I don’t have much spare cash to spend on costly repairs and replacement parts, I make sure to put in the routine maintenance work when it really matters. If you take a few minutes to perform some checks before leaving the dock, you’ll thank yourself later.
Begin by systematically checking the fuel system. For starters, top off your gas tank and check the fuel lines for leaks. You’ll also need to poke around among the line connections to ensure they’re good and tight. Next, shift your attention to the oil level. Replenish your supply of Evinrude oil in the fuel tank. Yesterday we discussed the benefits and detriments of trimming your outboard; start with it in vertical position so it’s not tilted back or forward.

Last but not least, test out the steering controls. If you notice any sticking or looseness as you turn the wheel, it might be cause for concern. Likewise, the throttle and shifter should move with only slight resistance. Seek mechanical assistance if they catch or feel too mushy. Now that you’ve done the work, it’s time to have some fun out on the water.

Did you like this? Share it:

Basics of Outboard Trimming and Tilting

mercury-oil

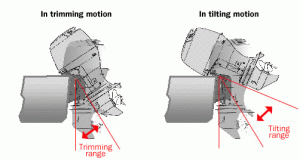
Although not every outboard motor allows boaters the option of power trimming – also known as raising and lowering the drive unit – it’s a feature that’s widely available in most new outboards. “Trim” is maritime jargon used to refer to the running position of the engine drive unit. Think about the way your own outboard descends from the transom and into the water.

If a motor is neutrally trimmed, it will be positioned in an almost perfectly vertical manner; the bow will be lowered and the propeller shaft stays parallel to the water’s surface. As one might expect, operating a boat with neutral trimming is probably the most fuel-efficient technique as it streamlines the machinery’s progress through the water. “Trimming in” occurs when the top of the outboard is pointed slightly back and way from the stern. Again, this method lowers the bow but improves the ability to plane and ride through choppy seas.

The final option, “trimming out” actually lifts the bow and boosts the craft’s top speed considerably. When a motor is trimmed out excessively, the boat will begin to bounce. This technique is often employed in racing and for achieving quick bursts of speed during short-term trips. However, be prepared to replenish the engine with a supply of Mercury oil. Trimmed out boats are never as efficient as they could be.

Did you like this? Share it:

Why Apply Antifouling Paint?

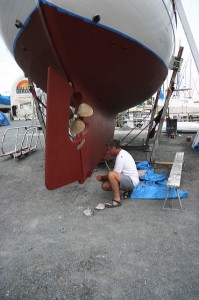
antifouling-paintIf you’ve ever taken a look at a tall ship or even a cruise liner, you may have noticed an element that most of those enormous boats have in common. Along the bow, the stern and the underside of the boat you’ll find barnacles and other saltwater mainstays. A shipwrecked vessel will attract even more barnacles than an active one. Needless to say, these crusty objects clinging to the underside of the craft do much to slow things down.
The hull of a boat running in saltwater might also acquire a collection of weeds and slime over time – something that must be avoided in order to maximize engine efficiency. The idea is to reduce drag, and that means dropping the dead weight. If the barnacles, seaweed and other assorted gunk have already taken hold, you’ll have no choice but to hose and scrape the hull.

Otherwise, simply apply some antifouling paint to the underside of the boat. The paint dries to form a smooth, hard surface that’s resistant to vegetable growth and clinging barnacles. The paint will thin out through the course of use, so it simply needs to be replenished at the beginning of each boating season. By keeping your boat running slick through the water, you can save money on other vital supplies – especially Evinrude oil.

Did you like this? Share it:

When Buying an Outboard, Think Long-Term

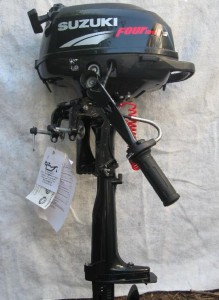
bulk-motor-oilBuying an outboard motor is a process that should not be taken lightly. As perhaps the most critical purchase you’ll ever make in regards to your boat, it deserves significant preparation and forethought. Take some time to explore the market – both online and at nearby dealerships. Scan the classified ads in your local newspaper for used outboards, but remember that most marine engines manufactured since 1990 should receive TC-W3 certified bulk motor oil.
Our logical tendency as consumers is to seek out the best deal, and to some that might mean the lowest price. Unfortunately, the cheapest goods don’t always equate to the best value. There’s a lot of truth in the old saying that “you get what you pay for.” Still, it’s possible to find a lot of value on the used market. You’ll just need to be discerning when making your selection.

When making your purchase, try to look beyond the price-tag and the immediate costs. All outboards require basic maintenance, and in the case of a high-quality model, that maintenance should be enough to make the engine last for years at a time. Before latching onto a bargain-basement-priced off-brand outboard, ask yourself if it’s really worth it in the long run.

Did you like this? Share it:

Even the Most Advanced Motors Need Maintenance

maintenaceBy now you’re probably familiar with the big three names in outboard motors: Evinrude, Yamaha and Mercury. In recent years, the Environmental Protection Agency has tightened its restrictions on engine efficiency and marine pollution. This just makes sense as the American public becomes more sensitive to ecological issues and biofuels are made a viable alternative to fossil fuels in automobiles.
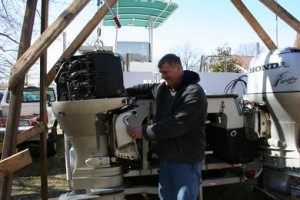
Unfortunately, with all of the technological and environmental upgrades made to outboards in the last year or so, it’s easy for boat owners to get complacent with their routine maintenance. For whatever reason, people believe these admittedly formidable machines can take care of themselves. Of course those beliefs are shattered the second something goes wrong on the mechanical end.

As always, the first step is to consult the owner’s manual for maintenance tips that are specific to each outboard model. Generally speaking, though, boat owners should adhere rigidly to the engine’s maintenance schedule. This schedule dictates when various services should be performed after however many hours of use. Some matters of routine upkeep – such as replenishing the engine with Evinrude outboard oil – are universal and should be done without fail. Other maintenance procedures should be completed according to the outboard’s age and the extent it’s used each year.

Did you like this? Share it:

Give Your Outboard a Revitalizing Cleanse

boat-cleaning

During the course of a typical fishing or cruising excursion, outboard motors collect sand and other debris from the surrounding water. In the unfortunate event that a boat runs aground, that amount of detritus increases exponentially. It doesn’t take a genius or a master mechanic to figure out that dirt and grime don’t mix with internal engine parts. Obviously something needs to be done to clean out the engine – but what?

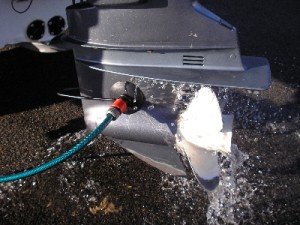
The answer lies in yet another essential piece of routine maintenance: the freshwater flush. While most Yamahas and other top-of-the-line 2 strokes feature a built-in freshwater flushing device fitting, some engines will require a pair of “rabbit ears.” These invaluable tools are so named because the two rubber seals are connected with a metal clamp. To use the Yamaha fitting, just connect a normal hose to the lower cowling.

It’s a common misconception that freshwater flushes should only be performed after a ride in salt water. While you might want to flush the engine more frequently in the case of saltwater boating, the process is important no matter what. In fact, along with other common maintenance procedures such as replenishing the engine’s supply of Yamaha 2m oil, flushing can add years of functional life to your outboard.

Did you like this? Share it: