Basic Boat Trailering: Part Two
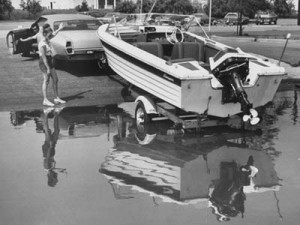
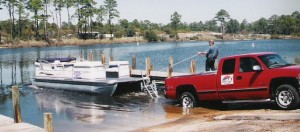
The first time you back your boat into the water it can certainly be daunting; I mean, it’s not everyday your supposed to back your vehicle towards a body of water. When you’re launching your boat, your trailer will obviously have to be submerged in the water. For some reason—unbeknownst to me—various trailer lights aren’t waterproof, which can lead to short-circuiting when they get wet. As such, always opt for the waterproof option.

If it’s your first time launching your boat (and even if you’ve done it hundreds of times), it’s a good idea to have someone get out and help guide you into the water. It doesn’t matter if the tires of the trailer get in the water, but you’ll want to avoid submerging the wheel hubs, which can lead to rust and corrosion. Once the boat can float, undo all of the ties and cables attaching it to the trailer and secure it to the dock. That probably seemed easy, so tomorrow we’ll go over the more difficult task: getting the boat back on the trailer.  Make sure you have all your essentials in the boat, life jackets, drinking water, cell phone and extra outboard motor oil.

Did you like this? Share it:

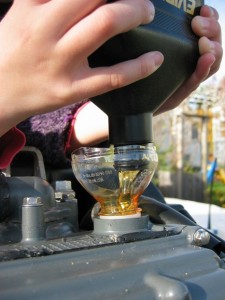
How to Change Outboard Motor Oil

While the two-stroke engine has fallen out of favor, it does boast one distinct advantage over its four-stroke successor: you don’t have to change the outboard motor oil. Sure, you have to mix the oil with gasoline consistently, but changing your oil can be a hassle. And if you neglect to do it, you can cause serious damage to your engine. You don’t have to worry if you have a four-stroke, however; changing your outboard motor oil is simple:

~Take the boat out of the water and put it on a trailer
~Remove the engine cover
~Check the oil using the dipstick in the crankcase
~Use the trim button to raise the motor, allowing the oil to drain out from the crankcase easily
~Drain the oil into an empty container. Take out the drain plug to allow all the oil to draw off.
~Replace the drain plug and refill the oil until it reaches the full level

Did you like this? Share it:

Preventative Outboard Motor Care: Part Five

After you’ve inspected the fuel line, move on to the fuel primer bulb and fuel line fittings. Lastly, check the tank vent to ensure the unit is aspirating properly and there isn’t any water in the fuel. Turn off the engine and the battery, and open the engine cover to check for any leaking fuel or water.

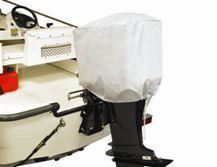
Lubricate all of the moving parts—the carburetor valves, shift and throttle cables, etc. Assuming you have a two-stroke engine, you’re going to need to mix the fuel with outboard motor oil before you refill the tank. Always be sure to use premium certified oil, such as Evinrude XD 100 oil. Once you’re finished, throw the cover on the engine to keep it safe during storage and transportation.

Did you like this? Share it:

Preventative Outboard Motor Care: Part Four

If you find the water used to flush your engine is hot or has debris in it, the most common culprit is some grime stuck in the flow tube. Insert a small piece of wire into the flow tube to dislodge whatever is blocking the system. If this doesn’t work, more often than not it’s a serious problem with the water pump, and you’ll have to take the boat to your mechanic. Once you’ve successfully flushed the engine, it’s time to move on to the other systems.

Disconnect the fuel line so the engine has an opportunity to burn all of the gas and outboard motor oil in the carburetor. A quick caveat: Always use fresh fuel in your vessel, so if the gas has been sitting around for more than two months, get rid of it. In addition to burning the excess fuel in the carb, also be sure to check the fuel line for cracks and signs of wear. In our final installment tomorrow, we will finish checking the fuel systems and cover a few more steps you can take to preserve your boat.

Did you like this? Share it:

Preventative Outboard Motor Care: Part Three

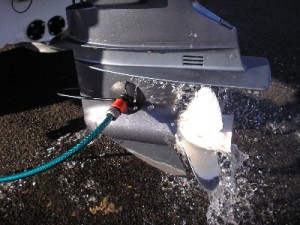
Flushing your engine is one of the most basic and essential components of outboard motor maintenance and as such, every boat owner should be well acquainted with the practice. Aside from a basic garden hose and a water source, the only other tool you need is a set of “rabbit ears”—and not the kind you put on your TV. These rabbit ears consist of two rubber hoses and a metal clamp.

Slide the rabbit ears onto the lower unit where the water intake is and hookup the garden hose. Turn on the engine and the water pump will start to do its magic. Once you start everything up, examine the water pump to ensure a good flow of H20. The water coming out of the pump shouldn’t be hot nor have any debris in it. If this is the case, turn off the engine immediately. Tomorrow will go over how to fix the problem, as well as other routine maintenance like how to change your marine engine oil.

Did you like this? Share it:

Preventative Outboard Motor Care: Part One

Now that the sun is shining and the days are long, taking time to care for your engine is probably not high on your priority list. And why should it bet; the summer is the time to go out and enjoy your vessel, not spend hours in the garage tuning your engine. However, if you neglect to care for your outboard motor, your time on the water could be fraught with disaster. Personally, I like to do my maintenance in the winter to maximize my boating time when the weather is fair.

From overheating and spent spark plugs to corrosion and rusting, a litany of mechanical problems can plague your motor. Luckily, preventing damage to your outboard motor is relatively simple and won’t take hours on end. You obviously want to change your outboard motor oil regularly, but this is only one of the necessary maintenance procedures. Over the next couple of days, we’ll overview a simple maintenance routine to help keep your engine up and running.

Did you like this? Share it:

Environmentally Safe Boating: Part One

With tens of thousands of barrels of oil gushing into the Gulf of Mexico everyday, people around the country have suddenly taken more interest in environmental issues, particularly as they pertain to the water. If you have been boating for years, chances are you were already well aware of the myriad risks that constantly threaten lakes, streams, rivers and oceans. And while you may not be able to produce a disaster on the scale of the BP spill, gasoline and outboard motor oil from your vessel are still a hazard to the environment.

To that end, it is imperative to take the proper precautions when changing your oil, fueling or handling other potential dangerous substances, particularly when you are around the water. As you can imagine, cleaning up spilled gas or oil from water is virtually impossible. Over the next few days we will be covering some of the basics on how to protect the environment and abide by federal and local laws.

Did you like this? Share it:

Boat Trailers and Launching: Part Five

Whenever you are towing your boat, no matter how short the journey, always be sure to bring along a spare tire. In my experience, trailers get flats far more often than cars. Also be sure to bring along a jack that has the capacity to lift your trailer and boat along with your extra outboard motor oil.  Once you successfully get the boat to the launch, the only thing left to do is get her in the water.

If you have never backed up a trailer before, I recommend practicing before you get to the ramp. Be sure to always keep the trailer in your sights and drive slowly while you are backing up. I could spend all of next week writing a series on how to back your trailer, but the fact of the matter is that the only way you learn is by doing it yourself. One tip, however: Don’t be afraid to pull forward and start again. It’s always easier to launch the boat when you are aligned properly.

Did you like this? Share it:

Boat Trailer and Launching: Part Four

When it comes to actually towing your boat, it is always best to err on the side of caution. If you have a modestly sized vessel, be sure to secure it to the trailer with straps. All boats under 1,000 pounds should be strapped down, and if there is any doubt in your mind, it’s worth taking the extra five minutes to secure the boat. In addition to the craft, be sure that liquids like outboard motor oil are secure and that life jackets and other accessories won’t fly out of the boat.

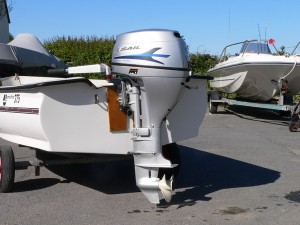
For those with an outboard motor, you should remove it when towing the boat in virtually all circumstances. It certainly is a hassle to take the engine off its bracket, but it’s more of a headache to have to replace your motor. And before you leave the driveway, be sure you know if your boat is covered by your insurance policy. Some auto policies won’t cover the boat while it’s on the trailer, so do your research.

Did you like this? Share it:

Boat Trailers and Launching: Part One

Seasoned boaters will undoubtedly put a considerable amount of time and effort into the upkeep of their craft. From changing the outboard motor oil to flushing the engine and cleaning the hull, most of the maintenance is centered on maximizing performance on the water. Many boat owners, however, store their boat in their driveway or a storage unit, meaning they have to launch the watercraft every time they want to use it. And while this is surely an inconvenience and many people neglect to learn the proper procedures, keeping your boat out of the water does have its advantages.

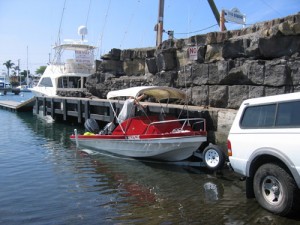
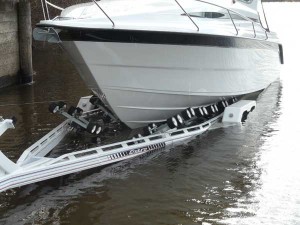
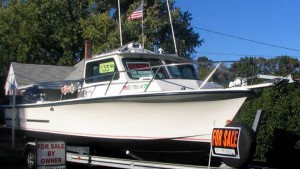
First, your boat will stay in better condition—especially if you clean it thoroughly on a regular basis. You also don’t have to worry about the myriad threats to your craft, including adverse weather conditions and careless boaters. Of course, constantly transporting your boat can be a headache, particularly if you don’t have the proper trailer or know how to launch the boat properly. Over the next few days, we will be covering some of the basics for purchasing and hauling a trailer and launching your boat.

Did you like this? Share it:

Buying a Boat: Part Four

Once you have thoroughly inspected everything—from the outboard motor oil to the hull—it is time to determine a fair price. The BUC and NADA books are reliable resources for pricing information but it is still a good idea to consult some local marine experts for a second or third opinion. Now that you’ve picked out the boat you want to purchase and have determined a target price, it’s up to you to close the deal.

Before we conclude our series on purchasing a watercraft, I want to emphasize the necessity of looking long and hard before you leap. Unlike a car, there are few practical reasons why the average consumer needs a boat—it is simply a source of entertainment. And between finance payments, insurance, registration, repairs, etc, the monthly costs are going to be considerable.

Did you like this? Share it:

Buying a Boat: Part One

Before you take the plunge and shell out thousands of dollars on a new seafaring vessel, it is important to do your due diligence to determine what type of boat you want, how much you can afford, and if purchasing a boat is really a step you want to take. If you will only be able to use the boat on the occasional weekend during the summer, the money and time needed may not be warranted.

Just like an automobile, the initial investment you put into a boat is just the tip of the iceberg. In addition to your boat payments, you also have to worry about insurance, registration, a trailer, outboard motor oil and a litany of other peripheral expenses. Of course, a boat is an investment, and if you use your boat regularly, these expenditures will indubitably be put to good use. For those who are steadfast in their conviction to purchase a boat, we will be highlighting some of the factors to consider throughout the week.

Did you like this? Share it: