What to Do When Your Engine Overheats: Part Three
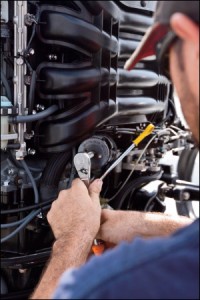
If you have adequate water flow into the strainer and can’t find any obstruction, chances are the problem is something more serious. Unfasten the clamps and remove the hose going into the water pump. Look in the seacock to ensure proper water flow: if water isn’t flowing, it’s an indication that you have a clog somewhere in the hose; if not, you’ll have to dig deeper.

Remove the face from the water pump and inspect the impeller; the fins should be pliable and not show any signs of wear. In addition to extra fuel and Evinrude XD50 oil, you should carry a spare set of fins with you in just in case this scenario occurs. If your fins are in good shape, all signs point to a broken water pump. This is obviously the worst-case scenario, but all is not lost. To get back to shore, remove one of the other electric pumps from the system and use it to connect the raw water intake to the cooling system, effectively circumventing the intake pump.

Did you like this? Share it:

Preventative Outboard Motor Care: Part One

Now that the sun is shining and the days are long, taking time to care for your engine is probably not high on your priority list. And why should it bet; the summer is the time to go out and enjoy your vessel, not spend hours in the garage tuning your engine. However, if you neglect to care for your outboard motor, your time on the water could be fraught with disaster. Personally, I like to do my maintenance in the winter to maximize my boating time when the weather is fair.

From overheating and spent spark plugs to corrosion and rusting, a litany of mechanical problems can plague your motor. Luckily, preventing damage to your outboard motor is relatively simple and won’t take hours on end. You obviously want to change your outboard motor oil regularly, but this is only one of the necessary maintenance procedures. Over the next couple of days, we’ll overview a simple maintenance routine to help keep your engine up and running.

Did you like this? Share it:

Marine Spring Cleaning: Part Three

The engine is unequivocally the most important component of your boat, and as such, it requires a thorough examination. We’ll begin with inboard engines, as the process is more in-depth. Start by changing the bulk motor oil and both the fuel and oil filters. Also ensure that the coolant and transmission fluid are topped off. Even if you’ve just replenished all of your engine fluids, always keep extra onboard. Finish by inspecting the entire system for cracks, rust, blockage and any other signs of corrosion.

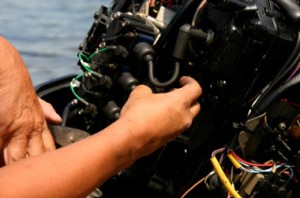
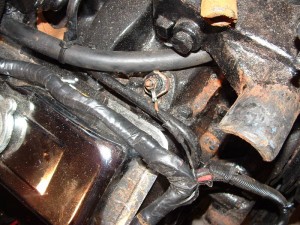
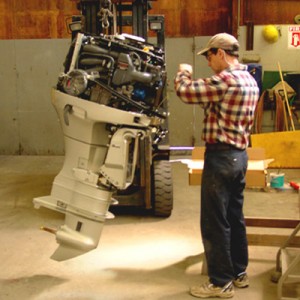
Maintenance for outboard motors is more straightforward. Replace the spark plugs and check the wiring for any damage. Lubricate all of the moveable engine components and make certain the gear lube is adequate. When you are finished working on the engine, ensure that the fuel shutoff valve and hoses are intact. Now that you have inspected your boat and done some basic maintenance, you’re ready to hit the water.

Did you like this? Share it:

Boating Safety: Part Three

As most people know, a life jacket is the most crucial piece of safety equipment on your boat. Before you leave the dock, be sure that you have a life jacket for every person on board and that it fits correctly. Although many states don’t require adults to wear a life jacket, it’s always smart to err on the side of safety.

In addition to a life jacket, every boater should have a supply of spare parts and tools. This cache should include a basic tools kit and miscellaneous parts for performing routine maintenance on the water, if need be. Always keep an extra supply of gasoline and two cycle outboard oil on hand as well. Even if you never have a need for it, chances are you will eventually encounter an unprepared boater who will appreciate your foresight.

Did you like this? Share it:

Boat Engine Maintenance and Troubleshooting: Part Three

As the heart of the boat, the engine should be near the top of your maintenance hierarchy. Changing your 2 cycle oil is obviously crucial, but it’s not enough. Most marine engine damage stems from neglect of the cooling system. Since marine engines use the water they are in as a cooing agent, the contaminants in the water also flow through the cooling system.

The water filters are the most important component to maintain in the cooling system. Opt for the premium models with metal strainers instead of plastic. Maintenance of the cooling system is particularly significant if you are boating in salt water. If this is the case, check regularly for rust around the gaskets, which is an indication that salt water is leaking out of the system.

Did you like this? Share it:

TC-W3 Certification: The Testing

The National Marin Manufacturers Association (NMMA) is the organization holding the trademark for TC-W3 and is responsible for all of the analysis. Each 2 cycle oil is put through a rigorous series of tests to ensure that it meets the highest lubrication standards under a range of conditions. A bench test is a trial conducted in a laboratory prior to a product being made available to the public.

To receive TC-W3 certification, every two-cycle oil must pass several bench tests, which include checks for viscosity, lubricity and fluidity, among others. Ring sticking and carbon buildup on the pistons are both checked for as well. Tomorrow we will look at the various engines that are used to test the oils and take a closer look at what it takes for an oil to be approved.

Did you like this? Share it:

Jetting Your Carburetor: Part Three

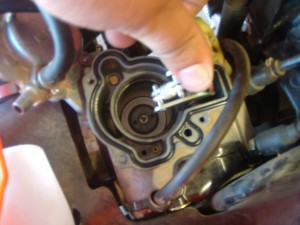
Just as the main jet controls the flow of fuel and bulk motor oil when the throttle is open, the needle and needle jet take over when the throttle is anywhere from one-eighth to three-quarters open. Since your engine is operating in this range the majority of the time, this carb circuit generally gets the most use. When making adjustments, the needle itself rarely needs any tuning.

As the throttle opens, the needle is pulled up. This allows an increased flow of fuel and oil. If need be, you can make minor adjustments using the clip that is on the needle; raising the clip will make the mixture leaner, and vice-versa. Tomorrow we will go over the final circuit of the carburetor, the pilot jet and pilot screw.

Did you like this? Share it:

Outboard Motor Anatomy: Part Three

Now that we have gone over the two cycle oil and gasoline specifications, as well as the benefits of the outboard motor, it is time to determine which model is right for you. The motor that you choose will be largely dependent on the hull of the craft that you plan to attach it to. Every boat built in the US has a “Guard Rating Plate”; this shows the maximum horsepower for the motor, but you should also be sure never to go below 75 percent of this number.

The other main spec to take into consideration is the shaft length. On outboard motors, this measurement is customized to fit 15, 20 or 25-inch transoms (the stern of the watercraft). When the shaft length is too long, there will be drag, while if the shaft is too short, it could lead to ventilation or potentially the overheating of the engine.

Did you like this? Share it:

Snowmobile Storage: Part Two

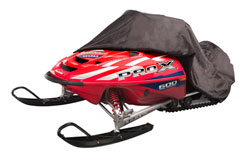
The first thing to do when storing your sled is to wash and wax every inch. While this may seem like an unnecessary and purely aesthetic routine, this will help protect the paint job and the body of the vehicle. Once this is done, give the sled a quick onceover to find any chips or cracks, and it is advisable to paint the ski bottoms as well.

Now that the body is done, it is time to move on to the engine. Start up your snowmobile and pull on the oil pump cable to allow your 2 cycle oil to circulate through the entire system. Next, you want to fill the fuel tank completely, which will eliminate air space in the tank and ensure that condensation can’t form.

Did you like this? Share it:

ATV Safety Measures

DomoOnlineATVSafety

The urge to push boundaries and explore terrain is as distinctly American as baseball and apple pie. For all-terrain vehicle enthusiasts, the “road” is merely a restriction that’s meant to be ignored. Modern ATV riders are our version of trailblazers, creating new paths wherever they ride. The thrill and sense of danger associated with ATVs makes them especially popular among the younger generation.

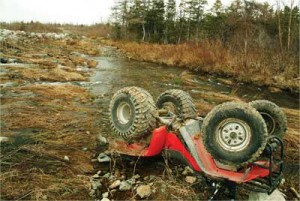
But even thrill seekers require some modicum of safety. ATV accessories such as roll cages and cap enclosures offer critical benefits in terms of protection and rider security. These accessories come in handy no matter where a ride might occur – in the back woods, through a swamp or even on a job site. While ATVs give you the opportunity to explore remote locations, you don’t want your vehicle to break down miles away from civilization. Always be sure to bring some extra fuel and your check XD50 oil before embarking on a long trip.

Did you like this? Share it:

How Does an Outboard Motor Work?

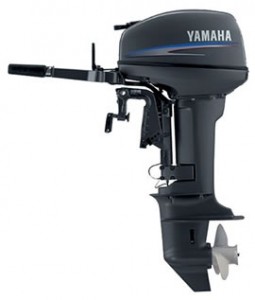
yamaha_2_stroke_9_9Since their introduction in the early 1900s, outboard motors have revolutionized the way in which we think about boating. Prior to that, boaters and fishermen were largely dependent on the direction of wind or – for those who felt like using oars – brute force. Outboards have taken the focus of our attentions of locomotion, allowing us to think about catching fish or just enjoy the scenery.

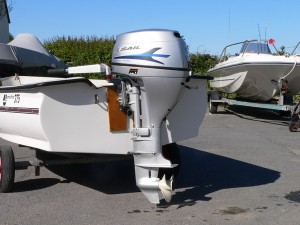
Marine motors work in a deceptively simple way. Much like car engines, they generate power by burning gasoline and oxygen inside a cylinder. In the case of a boat, only one cylinder is generally used. The end result is that the engine powers a propeller submerged below the water’s surface and behind the boat. Two cycle outboard oil is applied to keep the motor properly lubricated and running smoothly.

So, it all starts in the cylinder where gasoline mixes with air, burns and creates power to move the piston back and forth. The piston rod connects to a crankshaft, which turns and causes the main driveshaft to turn as well. This long driveshaft is attached to a gearbox that converts the spinning motion into kinetic energy to move the propeller. Finally, the propeller pushes the boat through the water.

Did you like this? Share it:

Snowmobiles Explained: Safe Sledding

snowmobiling1Today we conclude our week-long look at snowmobiles. It all began Monday with an exploration of a typical sled’s drive system. From there, we compared and contrasted snowmobile tracks with those of a tank. Yesterday we posted some brief thoughts on the environmental impact of snowmobiling and the importance of replenishing two cycle oil. Now let’s head even further down the trail to discuss safety tips.

As is the case with any vehicle, you must familiarize yourself with the terrain before deciding to see how fast you can go. You wouldn’t drive 55 mph in a car down a narrow residential street for obvious reasons. Even if you’re riding a snowmobile in a secluded spot, the quality and condition of the snow will make a huge difference. Snowmobiles are set lower to the ground than motorcycles, which might lead you to believe that there’s less risk of injury. Bear in mind, however, that the open sled design creates a very real possibility of falling off.

The most critical pieces of safety equipment for a snowmobiler are the helmet, gloves and boots. Gloves and boots help keep the extremities safe from frostbite, which can nip away at fingers and toes to make precision steering a difficult task. When sledding in a populated area, snowmobilers must be familiar with conventional hand signals – they’re very similar to the ones used by bicyclists. For example, a right turn is signaled by sticking the left arm straight out to the left. A right turn is signaled by pointing a bent left arm upward.

Did you like this? Share it: