Offseason Snowmobile Care: Part Five
In the final installment of our series on storing your sled, we’ll look at some final measures to take before relegating your vehicle to a safe corner for its summer hibernation. Some models will have a secondary clutch, and if this is the case, you will need to disassemble it and apply grease to the sheave bushing. Lastly, every metal surface, nut and bolt should be coated with a preserving oil to prevent rusting be sure to keep the oil away from plastic and rubber components.

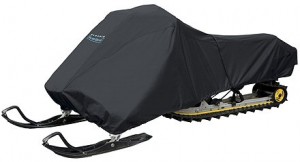
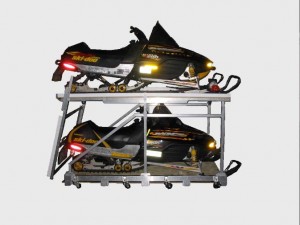
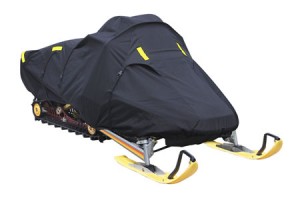
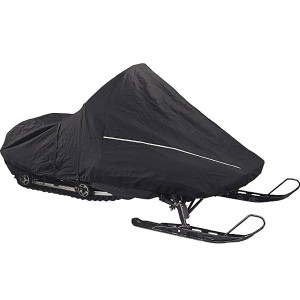
When determining a location to store the snowmobile, look for a dry place that is free of moisture. Place a cover over the body of the sled and put blocks underneath the front bumper and the rear frame, which will keep the track and skis off the floor. Refrain from starting the engine until the next season, as this will extricate the oil from the system. Before you startup you snowmobile next season, be sure that you double-check your Evinrude XD 100 and other essential fluid levels.

Did you like this? Share it:

Offseason Snowmobile Care: Part Four

When your sled is left idle for a prolonged period of time, the fluid levels and charge in the battery to diminish. Before storing your sled for the spring and summer, remove the battery and put it in a safe, dark area悠 recommend putting it where you keep your outboard motor oil and other supplies. Throughout the offseason, charge the battery periodically and fill it with distilled water if the fluid level drops below the fill line.

Fill the carb intake, muffler, and cooling system openings to prevent small animals from crawling into and nesting in your sled. It is also important to loosen the track tension bolts as far as they will go. If the track is kept taut during the offseason stretching and cracking may occur. Tomorrow we will go over the last preparations and finish our series on snowmobile storage.

Did you like this? Share it:

Offseason Snowmobile Care: Part Three

Yesterday we lubricated the entire system with Evinrude oil and prepared the fuel tank so that it won’t rust during the offseason; now its time progress to the carburetor and the drive belt. Begin by removing the float bowl drains from the carburetor, which will allow the fuel to escape. If fuel is left in the carburetor during the offseason, it will evaporate and leave a residue, which has the potential to clog passageways in your system.

Once the fuel is drained from the carburetor, remove the drive belt and store it unrolled in a safe location. Leaving the belt on during the offseason can cause it to warp to the shape of your sled. There is also the possibility of condensation collecting in-between the clutch sheaves and the belt, which will be detrimental to the smoothness of your ride. Tomorrow we will discuss proper storage of the battery and go over a few minor adjustments to ensure the integrity of your snowmobile isn’t jeopardized.

Did you like this? Share it:

Offseason Snowmobile Care: Part Two

Once the outside of the sled has been taken care of, it’s time to move to the more pressing concern: the engine. Begin by firing up your snowmobile and pulling the oil pump cable; doing this will enable a rich mixture of Evinrude XD100 oil to flow throughout the engine. The piston pin, bearings and some other engine components typically see little oil, and opening the oil pump ensures that they are properly lubricated before storage.

After you have ran the engine for 10 to 15 minutes, top off your fuel and add a fuel conditioner according to the specifications. It is important to top off fuel during the offseason to ensure there is no air in the tank. When the tank has air in it, condensation can form, which can wreak havoc on your machine. Now that we have dealt with the fuel and oil, tomorrow we will progress to the carburetor and drive belt.

Did you like this? Share it:

Offseason Snowmobile Care: Part One

Now that spring is in full swing, most of us won’t be going anywhere near our snowmobiles for a couple of months. But just because you won’t be on the back of the machine doesn’t mean that your snowmobile is out of harm’s way. A litany of things can go wrong with your vehicle while it’s in storage—from cracked parts and scratched paint to stale gasoline and outboard motor oil. To that end, it is imperative to take the proper precautions when storing your vehicle.

The first thing to do before putting your snowmobile in storage is to clean and polish it thoroughly. If using a pressure washer, use caution around bearing seals, as water can leak in and cause components to rust. Once the machine is dry, look for cracks and other signs of wear or damage. Now that the sled is clean and the body inspected, tomorrow we will start dealing with the various parts under the hood.

Did you like this? Share it:

How to Change Boat Motor Oil: Part Five

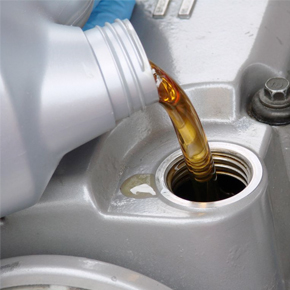
Now that the old oil has been exorcized from the engine and a new oil filter is in place, the only thing left to do is pour in the fresh oil. Each manufacturer will have their own specifications and recommendations for what type of oil to use in your craft, and it is a good idea to consult your owner’s manual before making a purchase. However, it is usually a safe bet to go with a premium product like Evinrude XD 100 oil.

Even if the filler opening is easily accessible, I recommend using a funnel and, if necessary, a hose to minimize spills and keep the process clean. It may seem like a lengthy process, but the time you put into changing your oil will be well worth it. Maintaining clean oil in your system will not only protect your boat and increase its longevity, but you will also notice a palpable improvement in its performance on the water.

Did you like this? Share it:

How to Change Boat Motor Oil: Part Four

Manufacturers will have different recommendations as to when to change your oil filter; however, it is advisable to invest in a new filter every time you change your oil. If your oil filter mounts vertically, it should be fairly simple to replace. For oil filters that are bewilderingly mounted horizontally or upside down, you will need to have a bag ready to contain the outboard motor oil that will inevitably spill during the removal process.

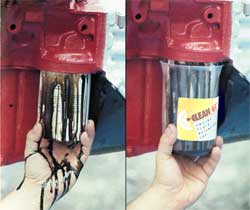
The vast majority of oil filers spin-on, which means that you will need a strap wrench to remove them. Before putting the new oil filter into place, coat the gasket with oil. Screw the filter in by hand, ensuring that the gasket makes full contact, and then tighten it another three-quarter turn. For older boats, there is typically a center bolt that must be removed before you can access the cartridge oil filter.

Did you like this? Share it:

How to Change Boat Motor Oil: Part Three

Now that we have familiarized ourselves with the two methods for extricating used oil, it’s time to go through the step-by-step process of actually changing your Yamaha 2w oil. You’ll want to start the engine before removing the oil, which serves dual purposes. Obviously this will heat the oil, making it easier to suck through the pump that you are using. Another reason for heating the engine is agitate the sediments that are dormant in the bottom of the oil pan, ensuring they will be sucked up through the pump.

When removing the oil, you will need a closeable receptacle to collect the fluid in. Look for a container that has a small opening for the hose and a sufficient volume—a milk jug is ideal. Remember, you can’t simply through away your used oil. It is important to take it to the marina or a service station that can recycle or dispose of the oil properly.

Did you like this? Share it:

How to Change Boat Motor Oil: Part Two

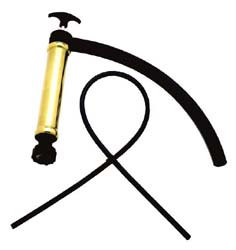
Yesterday we went over one of the most common ways to change your boat oil—through the drain plug. However, many engines don’t come equipped with a drain plug or if they do, it is often remote and virtually impossible to reach even after attaching a hose. In these scenarios, it is necessary to purchase a pump to suck the used oil out through the dipstick tube. Before you go purchase a pump, it is important to inspect your dipstick tube to see if it is threaded or not.

If your dipstick tube is threaded, you can simply screw on a pump and the oil will be eradicated after a few pulls. On the other hand, if your tube is not threaded, you will have to insert a pick-up tube into the dipstick tube to remove the Evinrude XD100 oil. When using a pick-up tube, be sure that tube reaches the bottom of the oil pan and that you attach a capped piece of PVC to sheath the pick-up tube.

Did you like this? Share it:

How to Change Boat Motor Oil: Part One

Changing the oil in your boat’s engine is virtually guaranteed to be a messy and time-consuming chore, but it is essential to ensure high performance. For most boats, the manufacturer recommends changing the oil every 100 hours, which few boat owners actually do. There are a few different options when it comes to changing your outboard motor oil, and over the next few days, we will go through these processes step-by-step.

The first and most common way to drain your oil is through the drain plug. Start by placing a disposable container—a foil pan works fine—underneath the engine to catch the used oil. If you have limited space, you can attach a hose to the drain plug and transfer the oil into any container of your choosing. The main downfall to utilizing the drain plug is that it is often difficult to access and space to catch the oil may be limited.

Did you like this? Share it:

Preseason Boat Maintenance: Part Four

For most of us, many of the components of the boat motor and inner workings of the craft are arcane and obscure. Even so, there are a few critical parts that every boater should check before the season, and if there is something that you are unsure of, be sure to take your craft to a qualified professional. Of course, the first aspect of the motor to inspect is the fuel line; make sure that the line is intact and that there are no signs of wear. Also check the fuel primer bulb and look for any loose fittings or leaks.

After you’ve inspected the fuel line, move to the tank and check for corrosion, rust and any leakage. Once the fuel tank and line are cleared, make sure that the battery holds a charge and has the proper fuel levels. Finally, change your Evinrude XD 100 and top off the other essential fluids, such as coolant.

Did you like this? Share it:

Preseason Boat Maintenance: Part Three

One of the paramount tasks in any preseason maintenance routine is a thorough eye-inspection; it doesn’t matter if your outboard motor oil is topped off and your battery is charged if there is damage to the body. Many people assume that damage to their boat is due to weathering stormy conditions and blasting through choppy water. In fact, many of the repairs that you have to perform will be a result of mooring.

As such, it is important to check the hull of the ship and areas that have a propensity of contacting the dock. It is also advisable to double-check your lines when you tie up your ship to ensure there is minimal slack, which will prevent damage in the future. During this basic inspection, also check for any loose fittings and other parts that may have worn down during last season.

Did you like this? Share it: