Gauging Your Spark Plugs: Part Two
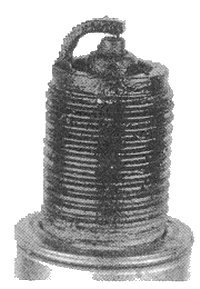
Knowing how to evaluate your spark plugs is a useful skill for adjusting the flow of gasoline and outboard motor oil your vehicle’s engine burns and identifying other potential engine problems. Last time we went over what a normal and dry spark plug will look like, and today we will finish reviewing the various problems that the spark plug can indicate.

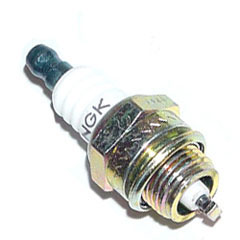
If the insulator is wet and black, it is a likely signal of wet fouling, which is caused by too rich of a fuel to oil ratio or unwarranted use of the choke. Chalky buildup or bumps on the insulator are caused from excess deposits, which are created due to poor fuel quality or bad oil. Lastly, a white and melted insulator shows that the engine is overheating. This is caused by too lean of a fuel mixture or problems with your spark plug placement and heat range.

Did you like this? Share it:

Gauging Your Spark Plugs: Part One

Routinely changing your vehicle’s filters, Evinrude XD 100 oil and other essential lubricants is essential to maintaining peak performance and ensuring longevity. Another crucial component to keep tabs on is the spark plugs, but few people know how to change them or tell when the old ones are shot. Here is a quick guide for evaluating the condition of your spark plugs.

When examining spark plugs, you will want to look at the insulator color, which is an indication of how much wear and tear has been inflicted. The insulator will be grey or light brown if the spark plug is operating properly. If the insulator has buildup, it is a sign that it is dry, which can be caused by an improper air to fuel ratio and problems with the ignition system. Next week we will overview some of the other problems that could be plaguing your spark plugs.

Did you like this? Share it:

Wheel Offset Basics

Outside of replacing the outboard motor oil and filling up their ATV with gasoline, many people have little knowledge about the specifications and proper maintenance procedures for their off-road vehicle. One of the most common measurements on an ATV is the wheel offset. There are three common offsets for off-roading vehicles: 2:3, 3:2 and 4:1.

Essentially, the offset is a measurement of the vehicles rims. When the numbers are expressed as they are above, the first number is the inside measurement and the second number is the outside, both of which are shown in inches. The offset that you choose for your ATV will affect the stability and height of your bike, so be sure to take it into consideration.

Did you like this? Share it:

Outboard Motor Anatomy: Part Three

Now that we have gone over the two cycle oil and gasoline specifications, as well as the benefits of the outboard motor, it is time to determine which model is right for you. The motor that you choose will be largely dependent on the hull of the craft that you plan to attach it to. Every boat built in the US has a “Guard Rating Plate”; this shows the maximum horsepower for the motor, but you should also be sure never to go below 75 percent of this number.

The other main spec to take into consideration is the shaft length. On outboard motors, this measurement is customized to fit 15, 20 or 25-inch transoms (the stern of the watercraft). When the shaft length is too long, there will be drag, while if the shaft is too short, it could lead to ventilation or potentially the overheating of the engine.

Did you like this? Share it:

Outboard Motor Anatomy: Part Two

Yesterday, we highlighted the main difference between two and four stroke motors—the fact that you have to mix your Evinrude XD100 oil and gasoline—and today we will go into more detail on the anatomy of the outboard engine itself. The motor contains all of the essential components: the engine, gearbox and propeller. Not only does the motor give the boat its power, but it is also used for steering and handling.

While both inboard and outboard motor can be raised, outboard motors also tilt forward, making them ideal for navigating shallow waters. Outboard motors can also be removed more easily, which is convenient when it comes time for storage. This capacity for removal and their lightweight design also makes out outboard motors easy to repair.

Did you like this? Share it:

Outboard Motor Anatomy: Part One

The two-stroke v. four-stroke debate is an ongoing point of contention between boat owners around the globe. While four-stroke engines certainly have their advantages, two-strokes are ideal for small watercrafts. In the next couple of days, we will be going over the various elements of the two-stroke engine and in what ways it is superior to the four-stroke.

When comparing the two, the most discernable difference for most people is how you mix the gasoline and outboard motor oil. In a two-stroke engine, the oil and the gasoline are mixed together, whereas they are held in separate compartments in a four-stroke. This design makes the two-stroke simpler but provides better lubrication to the four-stroke.

Did you like this? Share it:

The Merits of the Outboard Motor

Our focus in this blog is obviously on oil, and, to a certain extent, outboard motors. When purchasing a new boat, one of the most crucial decisions is whether to go with an outboard, inboard or inboard/outboard motor. While the other two certainly have their merits, outboard motors are my weapons of choice for a variety of reasons.

First of all, and probably most importantly, they are the cheapest option. They also tend to be lighter, and you can easily remove them when not being used, making them simple to replace as well. Traditionally, outboard motors were two-stroke, which meant that you had to mix the outboard motor oil and the gasoline; however, today there are several four-stroke options.

Did you like this? Share it:

Snowmobile Storage: Part Three

After you have allowed the Evinrude XD 100 to flow through the system and topped off your fuel, it’s time to drain the carburetor. Doing this prevents the buildup of residue that could potentially cause blockage next season. After this is done, you’re going to want to remove the drive belt and stow it by itself; this keeps it from forming to the shape of the sled.

Remove the battery and store it in a dark area, charging periodically throughout the offseason. Loosening the track tension will prevent it from stretching or cracking will in storage. Finally, you are going to want to apply oil to all of the metal surfaces to inhibit rusting. Once all of these steps are complete, put the sled in a safe, dry place and brace yourself for a long offseason.

Did you like this? Share it:

Snowmobile Storage: Part Two

The first thing to do when storing your sled is to wash and wax every inch. While this may seem like an unnecessary and purely aesthetic routine, this will help protect the paint job and the body of the vehicle. Once this is done, give the sled a quick onceover to find any chips or cracks, and it is advisable to paint the ski bottoms as well.

Now that the body is done, it is time to move on to the engine. Start up your snowmobile and pull on the oil pump cable to allow your 2 cycle oil to circulate through the entire system. Next, you want to fill the fuel tank completely, which will eliminate air space in the tank and ensure that condensation can’t form.

Did you like this? Share it:

Snowmobile Storage: Part One

Even though it is only March, I’m afraid that I already have no choice but to throw in the towel on this snowmobiling season. The extreme lack of powder has been disappointing to say the least, but at least the weather is nice enough that I can start taking out my ATVs. I always take precautions when storing my sled, but I will be particularly careful this year, as there will be an unusually long offseason.

The next couple of days we will outline the proper steps to take when storing your snowmobile. Handling the gasoline, Evinrude XD100 and other fluids appropriately is essential to prolong the life of your sled. It’s undoubtedly the last thing you want to do at the end of the season, but when you take your snowmobile out of storage next year, you’ll be glad you did.

Did you like this? Share it:

Pre-Season Boat Checks

I know that it is only March, but I am already beginning to prepare for the upcoming boating season. The weather here is already beginning to reach temperatures that make a weekend boating excursion look attractive. Of course, before I launch my watercraft for the first time, some routine maintenance and checks need to be done.

Before embarking on the first boating trip of the year, I always check the fuel line for cracks, wear and loose attachments. I also check the tanks for any damage and ensure that there isn’t any water in the fuel. And, of course, I always double-check the levels of fuel and outboard motor oil.

Did you like this? Share it: