Tools for Yamaha Outboards
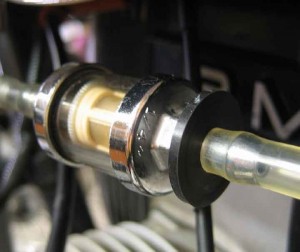
For any engine, having the right maintenance tools is a necessity. Yamaha has several specific tools that will keep outboards running in tip top condition. Take for instance, the Yamaha 10-micron fuel and water separating filter. The filter can be used for around 100 hours before needing replacement. The filter is critical to winterization setup.

A multimeter is another important tool to have in your arsenal. It is a device that is used to check electrical connections onboard and identifies problem areas. Though not strictly a tool, lubrication is vital to the function of a Yamaha outboard. Yamaha 4M oil is advisable for four stroke engines, and Yamaha 2M oil is advisable for two stroke engines.

Did you like this? Share it:

Troubleshooting an Evinrude E-Tec Motor

The Evinrude E-Tec outboard motor enjoys popularity because of its low maintenance. The fact that it can run for 300 hours without inspections or adjustments doesn’t hurt its reputation either. Still, even the best outboard motors can run into problems, so it’s important to know how to trouble shoot.

If a problem does arise, look first for blown fuses. A spare 10 amp fuse is provided by the manufacturer so you shouldn’t have to spend a lot to replace a blown fuse. Next, check the water intake screens and also check for kinked fuel hoses. Finally, check for debris in the Evinrude E-Tec. Gunk won’t allow the propeller to turn properly.

Did you like this? Share it:

Troubleshooting a Two-Stroke Outboard Engine, Part 2

Yesterday, we left off with checking and fixing ignition wiring. Once you’re confident that there are no lingering wiring problems, turn the engine on and listen for the engine turning over, and failing that, clicking. Turn off the engine and locate the starter mechanism or solenoid if there isn’t an engine starter.

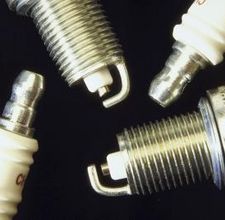
Tap the starter or solenoid with a screwdriver handle, and then try the ignition again. Next, pull the spark plug cap off and use a socket wrench to pull out the spark plug. If the spark plug is covered in gunk, replace the old spark plug, and add in new synthetic 2 stroke outboard oil. Finally check the fuel tank, vent, and fuel line for leaks.

Did you like this? Share it:

Yamaha Outboard Maintenance Tips

When it comes to keeping your watercraft in working order, there is a long maintenance check list. Today we’ll focus on two parts of that list: power trim and tilt fluid, and lubricants. Be sure to regularly inspect the lower unit to highlight issues. To prevent such issues from arising, keep the prop shaft well lubricated and top up levels of trim fluids. Yamaha products, like Performance Power, are preferable.

As far as lubricants, Yamalube 2-m oil or 4-m oil is recommended for two-stroke and fours-stroke engines, respectively. It is imperative that all replaced or repaired components be bedded correctly, and then sealed and protected with lubricant. Lubricating parts also aids in motion and can extend the life of an engine.

Did you like this? Share it:

Boat Engine Basics ~ Cooling

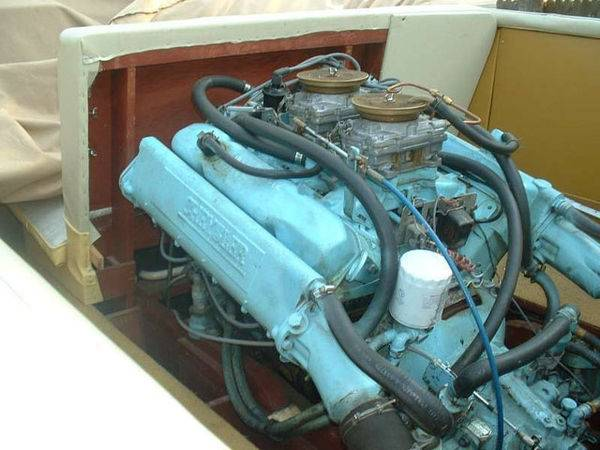
Last, but certainly not least, the cooling system of a boat engine is necessary for proper operation. However, where most other parts or functions of a boat engine are similar to that of an automobile engine, the cooling system is actually quite different. For a boat engine, raw water is pumped directly from the ocean, river or lake in which the boat is currently resting.

This water is then channeled through the engine block’s water jacket and is then circulated by the water pump where the water then flows into the risers. These specialty devices mix the boat exhaust with the water and the exhaust then forces the hot water back into the lake. And there you have it, in five days we have covered the basic parts of any boat engine so that, hopefully, you know a little more about its inner workings.

Keep your boat engine happy, clean and powerful with Evinrude XD 50 oil.

Did you like this? Share it:

Basic Outboard Maintenance: Part Five

We still have at least of few weeks of boating season left, but I figured it was important to discuss how to winterize and prepare your outboard motor for storage. It’s essential to take the proper precautions when  to ensure it starts up easily next spring. Before your last outing of the season, add some fuel conditioner to your mix of fuel and Evinrude XD 100 oil.

Always drain the system of all the gas and oil before putting the boat into storage, as the fuel will go bad if it just sits for months. If your lower unit calls for periodic lubrication changes, this is the time to do it. Look over the entire motor to ensure all of the bolts and fittings are in place and taut. Finally, put the motor in a dry place and keep it well covered, as small animals love to nest up in the crevices during the winter.

Did you like this? Share it:

Basic Outboard Maintenance: Part Three

Yesterday we went over some basic post-outing maintenance, which is essential to keep your engine running smoothly on a day-to-day basis. But for longevity, you’ll want to also go through a more extensive maintenance routine periodically. I do this routine about once a month during the season and when putting my boat in and taking it out of storage.

First, check the fuel and Yamaha 2M oil in the tank to ensure there isn’t any water in it; actually, I do this before and after each outing. Inspect the fuel line for any cracks or signs of wear and corrosion. The fuel primer bulb obviously should not have any cracks, and it should also feel pliable. Examine the fuel tank for damage and ensure the tank vent is aspirating properly.

Did you like this? Share it:

Basic Outboard Maintenance: Part Two

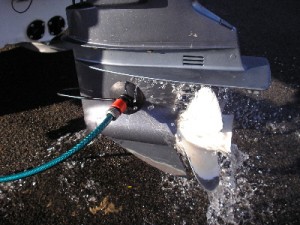
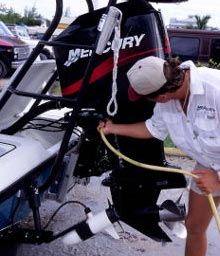
Immediately following every outing you should run through a short checklist to ensure your motor wasn’t damaged and will be ready for your next outing. The first line of business is to flush the engine. For this you’ll need a set of rabbit ears, which is a pair of rubber hoses connected by a metal clamp. The apparatus slips on to the lower unit where you can attach the garden hose.

When you’re flushing the engine, ensure that the water flowing through the system isn’t hot. If the water is hot or the flow is weak, it’s an indication that some debris is blocking the system. You can easily remove the blockage by inserting a small piece of wire into the flow tube. Once the engine has been flushed, spray down everything with some lubricant. Finish by topping off your tank with a mixture of fuel and Evinrude XD100.

Did you like this? Share it:

Basic Outboard Maintenance: Part One

The vast majority of outboard motor problems are easily preventable with proper care and routine maintenance. Flushing the engine after six hours of boating isn’t fun, but it will help you keep your engine performing in peak condition and extend its longevity. Although motor maintenance is a chore, it’s easy for virtually anyone with a tool kit.

Over the next couple of days, we’ll be covering some basic preventative care that should be done after every outing. We’ll also discuss some of the keys for long-term care, how to prepare the motor for storage, and some tips for protecting the unit during transportation. And we’ll go over the basics, including how to select and mix your outboard motor oil properly.

Did you like this? Share it:

What to Do When Your Engine Overheats: Part One

Even if you perform routine maintenance and change your outboard motor oil piously, things will go wrong when you are on the water. And when they do, it’s crucial that you know what course of action to take. If you boat with any regularity, you will inevitably have to deal with an overheating engine at some point.

One of the most common causes of overheating engines is a clogged intake. Garbage and debris is becoming an increasing danger to engines, especially if you are boating close to the shoreline, but simple seaweeds and underwater foliage can be hazardous as well. If you check the intake and it’s clean, you may have a more serious problem on your hands. Tomorrow we’ll go over a detailed contingency plan for the exact modus operandi in the event of an overheating engine.

Did you like this? Share it:

Outboard Motor Maintenance: Part Three

Now that the engine has been flushed, you can turn off the engine and turn your attention to the fuel aspect of engine maintenance. Never use fuel that is over two months old, which means you must refrain from using the same fuel from last season. Start by inspecting the fuel lines and primer bulb for cracks and other signs of wear. Ensure all of the fuel line fittings are secure and there is no rust on the fuel tanks or the clamps.

Open the engine cover and check to see if there is any leakage. Lubricate all of the moving parts in the engine, including the shift and carb valves. And if your have a four-stroke engine, don’t forget to change your Yamalube 2S oil.

Did you like this? Share it:

Outboard Motor Maintenance: Part Two

Yesterday we touched on the importance of flushing your outboard motor after each outing, and today we will overview the process. Begin by placing your “rabbit ears”—two rubber seals with a metal clamp—on the lower unit and attaching a standard garden hose. Turn on the engine and allow the water to pump through the system for 10-15 minutes. While the engine is being flushed, we can take care of some other maintenance.

Check the water pump to ensure an adequate flow of water; the water coming out of the system should be warm, not hot. If the flow is weak, insert a wire into the flow tube to loosen any debris. Once the engine is flushed, disconnect the fuel line to burn all of the excess gasoline and Evinrude XD100 in the carburetor. Tomorrow we continue discussing outboard motor fuel maintenance procedures.

Did you like this? Share it: